Configuring Personalized Tables and Fields
There are two steps to personalizing your Delightful Labor database. First, create a personalized table that will be attached to a parent table (people, business, donations, etc), and then add fields to the table.
In our example, we are going to add a Constituent Preferences table, which will be attached to people records. To begin, we select "Admin / Personalization":
Types of Personalized Tables
There are two types of tables you can attach to parent tables: single entry tables and multiple entry tables. A single entry table allows you to attach just one entry to the parent table. This would be used for information that does not change very frequently, such as demographics, initially intakes, or additional contact information. Multiple entry tables allow you to attach as many records as needed to each parent table. This is useful storing a history, such as ongoing assessments, contact logs, and status.
You can determine the table type when creating a personalized table, but the table type can't be changed once created. All field types (text, numbers, drop-down lists, dates, etc) are available for both table types, with the exception of log fields. Log fields are only available on single entry tables.
Creating a Personalized Table
You will see a list of all the personalized tables, grouped by the parent record type. You can attach personalized tables to the following records:
- Businesses
- Clients
- Client Locations
- Donations
- People
- Sponsorships
- Volunteers
You can add as many personalized tables as you need.
Initially there are no personalized tables in your Delightful Labor database. To add a new table, find the parent record you are interested in (people records in this example), and click the "Add new table" link:
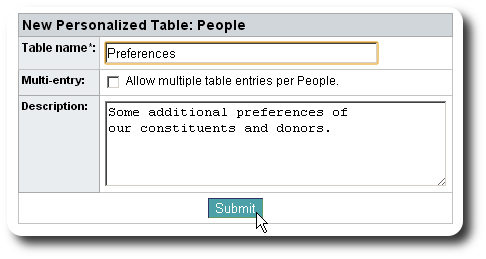
Now enter the name of the table, and optional comments. In this example we are creating a single-entry table. Click "Submit" when finished.
Creating Fields
After creating a table, you will be returned to the personalized table screen. We now see our new table, but it is empty. We now work with our table fields by clicking the view icon:
Initially there are no fields in our new table. We click the "Add new field" link:
We are a asked to select a field type. Delightful Labor supports a rich variety of fields:
- Checkbox - this is useful for Yes/No type of information
- Date - a date field, which you can access by a pop-up calendar
- Text (20/80/255 characters) - text information, in a variety of lengths. You can improve the efficiency and size of your database by using the appropriate size
- Text (long) - allows you to enter long text information (pages and pages, if necessary)
- Number - allows you to store an integer number
- Currency - allows you to store currency (with two decimal places). You will also associate an accounting country with the currency field
- Drop-down list - this allows you to chose an entry from a list of entries. More information about defining drop-down list entries is provided below.
- Log - allows you to maintain a blog. You can have as many blog entries as you like, and each entry can be as long as you like. The blog entries are timestamped and contain a title. Log fields are only available in single-entry tables.
Here is an example of adding a checkbox field:
An example of adding a date field:
Here is an example of adding an 80-character text field:
Note that we can add a default text.

Here is an example of adding a number field:
Here is an example of adding a currency field.
Note that we must associate an accounting country with the currency field.
Here is an example of adding a drop-down list. We will add list entries later.
Here is an example of adding a log field:
We now see the fields we added to our table.
In the right column, we see a set of arrows. These arrows allow us to reorder the fields in the table. We can move the individual entries up, down, to the top, or to the bottom. When you hover your mouse over an arrow, it will remind you of the action the arrow provides.
Configuring a Drop-down List
Recall that earlier we created a drop-down list called "Preferred method of communication", but we did not add any entries to the list.

To add entries, click the link "Click here to configure":
Initially there are no entries in the drop-down list. Click the link to add a new entry:
We enter our list item, then click "Submit":
We continue adding list items. Note that we have the same sorting ability for drop-down list items as was described earlier.

When we return to our table field definitions, we see all the fields we've created.
Now when we view a people record, we will see the personalized table we just created. The next section describes the process for editing the information in a personalized table.
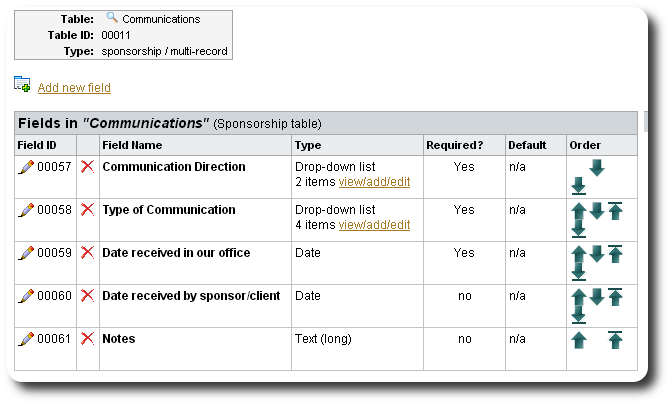
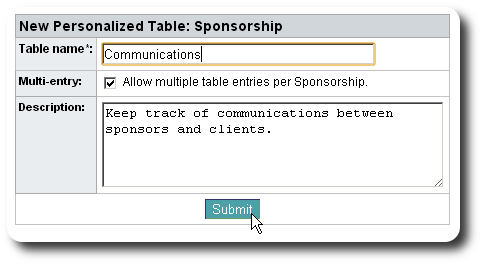
Creating a Multi-Entry Table
Creating a multi-entry table is very similar to creating a single-entry table, except when initially creating the table, you indicate that the table will allow multiple entries. In this example, we will create a communication log table that will be associated the sponsorship records. It will be used to track mail, photos and gifts between sponsors and their sponsored clients.
We add fields in a similar manner. After completing the field definition, our table looks like this: